Using Portainer: relief for developers who lost their enthusiasm
Managing Docker images, containers and stacks from a browser. A step by step setup on a Google Cloud virtual machine.
Also available in Turkish This post is a translation.
Contents
- The steps
- Step 1, creating a virtual machine on Google Cloud
- Step 2, making the IP address static
- Step 3, connecting to the virtual machine
- Step 4, installing Docker and Portainer on the virtual machine
- Step 5, opening the published port to outside access
- Step 6, using Portainer
- Step 6.0, first login to Portainer
- Step 6.1, installing an example template, WordPress
Hello. I had not posted anything for a long time, but this tool made my work so much easier that keeping it to myself felt selfish. So I will explain how to use it by creating a virtual machine on GCloud.
First let me say what Portainer is. Portainer is a web application where you can control your Docker images, containers, volumes and stacks, and add or remove them. It is also a Docker image itself. Once you install it, for example, you can publish all your Docker images on any port of your web server directly through Portainer without ever connecting to your virtual machine. You can install WordPress without connecting to the machine, and install a file browser to design that website without opening a single FTP connection. You can even install a web terminal to reach your virtual machine from the web and connect to it from your phone. I will try to explain all this hands on with GCloud. I am doing it with virtual machines on GCloud, but you can do it on any web server.
The steps
Step 1, creating a virtual machine on Google Cloud
We create a virtual machine on Google Cloud. It can have any specification. You can create one of the smallest ones for experimenting.
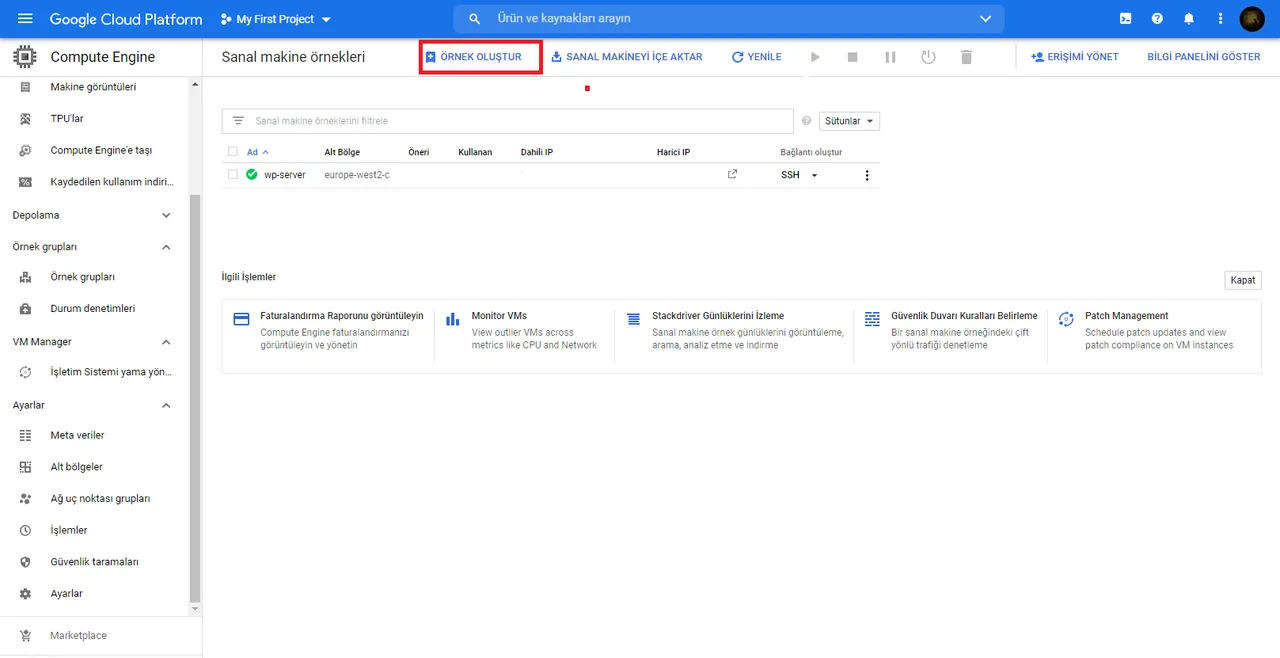
Important note: when creating the virtual machine you have to say allow HTTP/HTTPS traffic, because we will reach the machine from outside using a static IP. You need to confirm the configuration I share below while creating it.

Step 2, making the IP address static
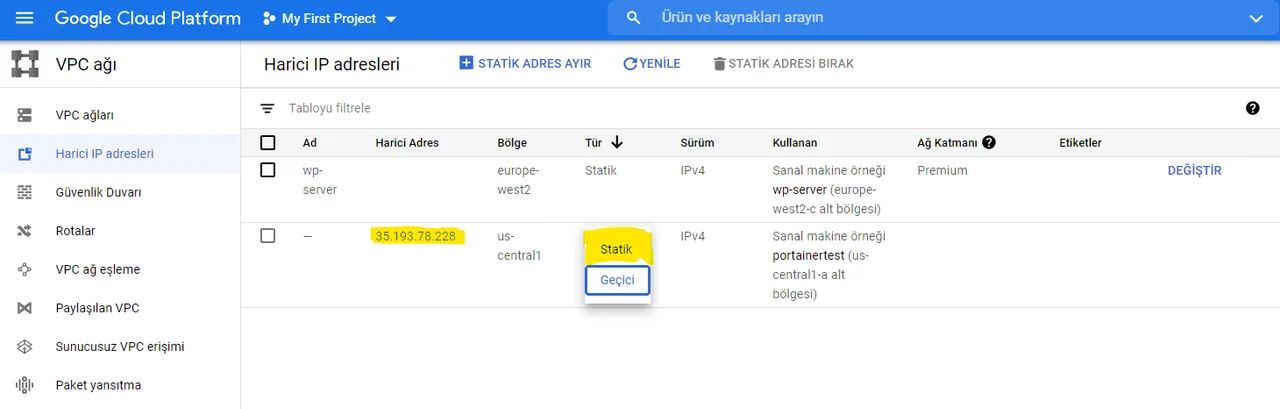
From the virtual machine instances page, we make the external IP address of the machine we created static from the VPC Network section.
Step 3, connecting to the virtual machine
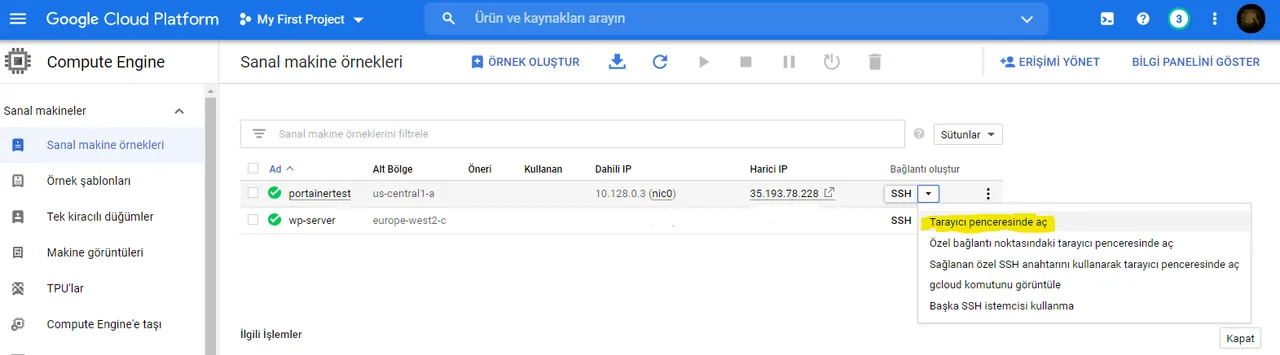
From the virtual machine instances page we click the open in browser window option under connect.
Step 4, installing Docker and Portainer on the virtual machine
We enter the commands below in order into the terminal in the window that opens.
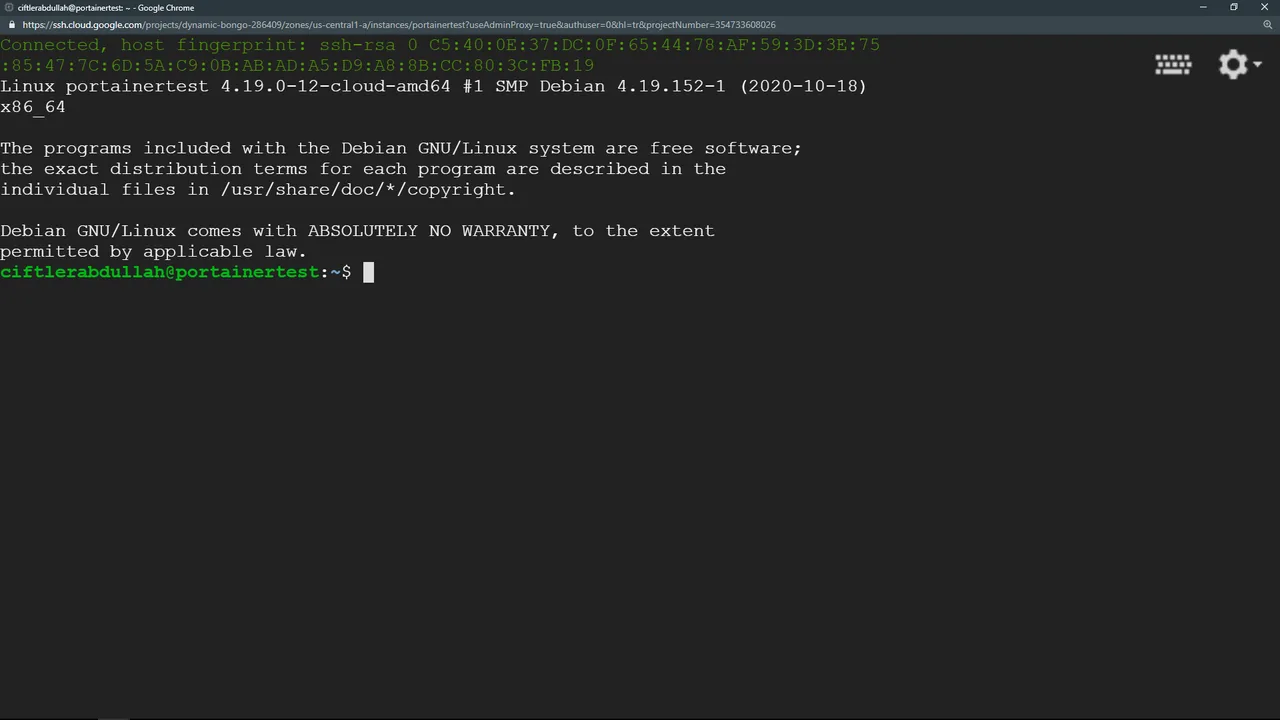
To install Docker:
sudo apt install docker.ioTo start the Docker service:
systemctl start docker
systemctl enable docker
To pull Portainer onto the server:
sudo docker pull portainer/portainer
-ce
To publish Portainer on port 9000 of the external IP address:
sudo docker run -d -p 9000:9000 -v /var/run/docker.sock:/var/run/docker.sock portainer/portainer-ceStep 5, opening the published port to outside access
After this the only thing left is to open the port you published on to outside access in the firewall of your web server. On my own server I opened ports 9000, 9001, 9002, 80 (the URL itself) and 22 (for ssh) to outside access. I plan to install images of different applications on those by creating containers through Portainer.
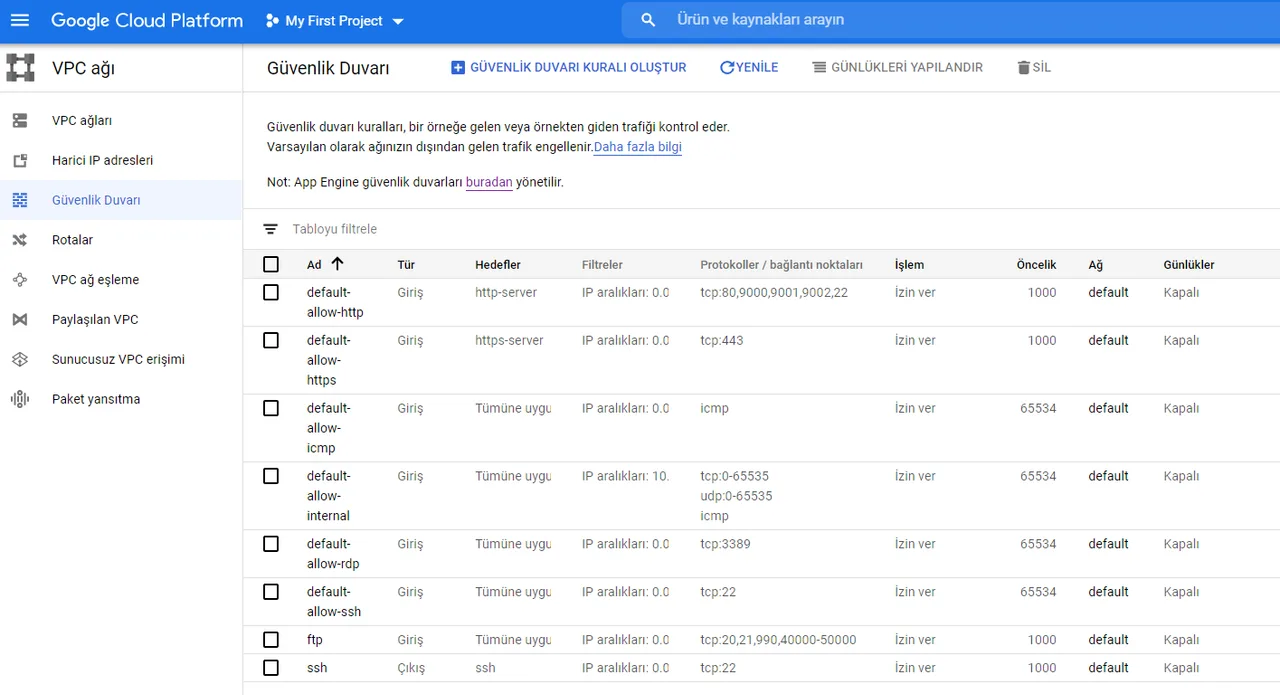
Step 6, using Portainer
Step 6.0, first login to Portainer
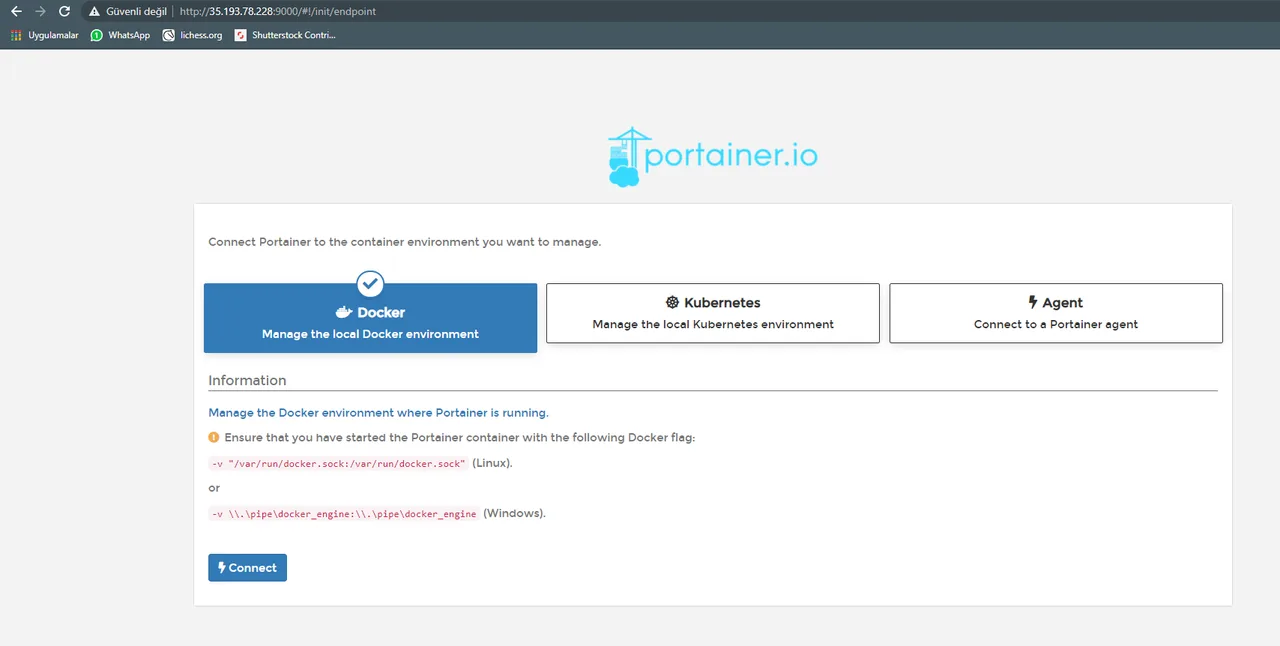
To reach Portainer we add the port we published on to the external IP (public IP) of the virtual machine we created. For example, if the IP of my machine is 35.193.78.228 and I publish Portainer on port 9000, then connecting to 35.193.78.228:9000 means I reach Portainer.
On first login a page for creating an admin user appears. You create the admin user and use that user from then on. For projects with several people you can also add different users and give those users different roles.
Important note: on the page that comes right after, be careful to select Docker and continue.
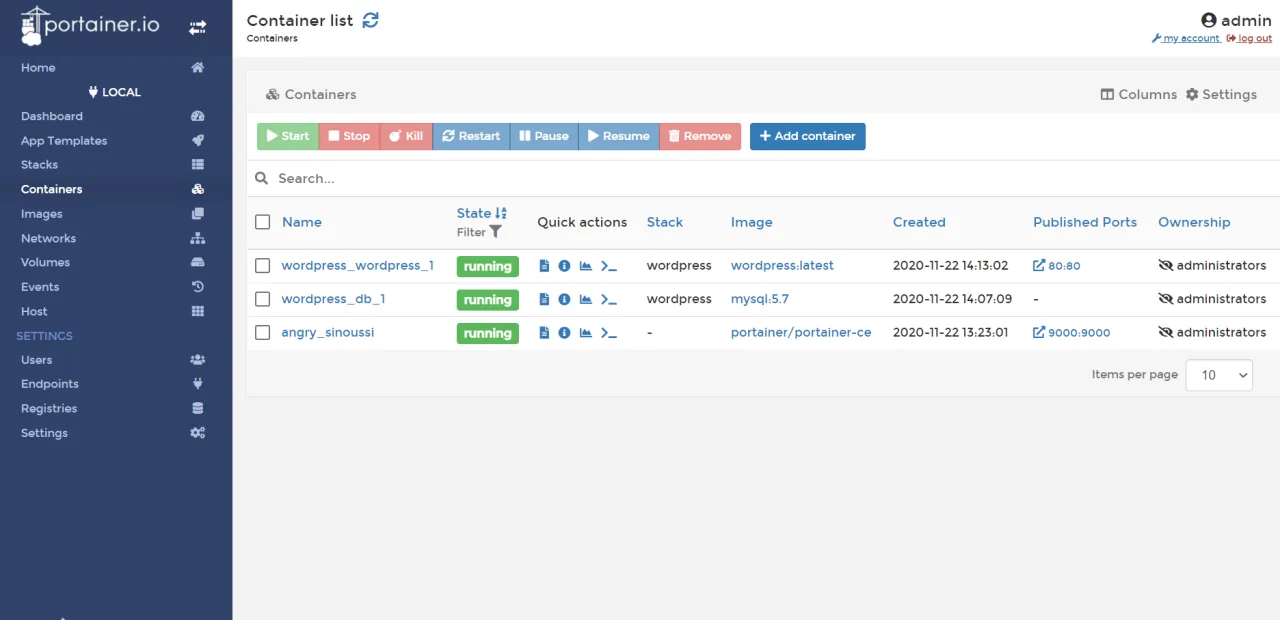
Once the setup is fully finished, the first screen you see looks like this.
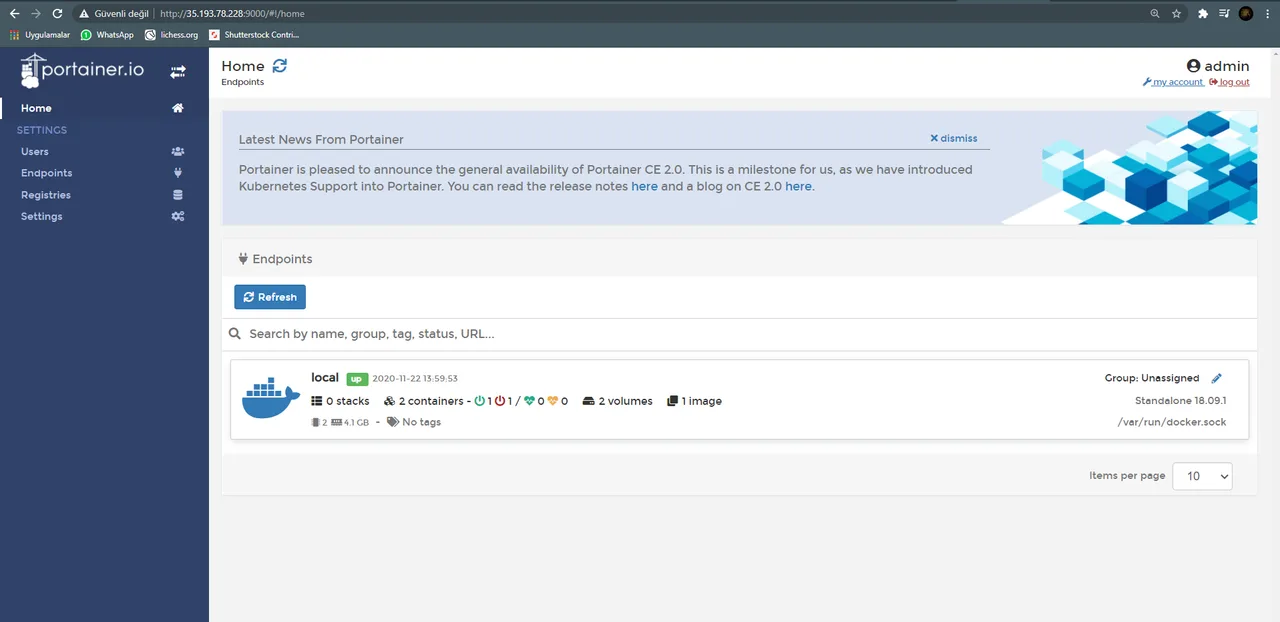
Step 6.1, installing an example template, WordPress
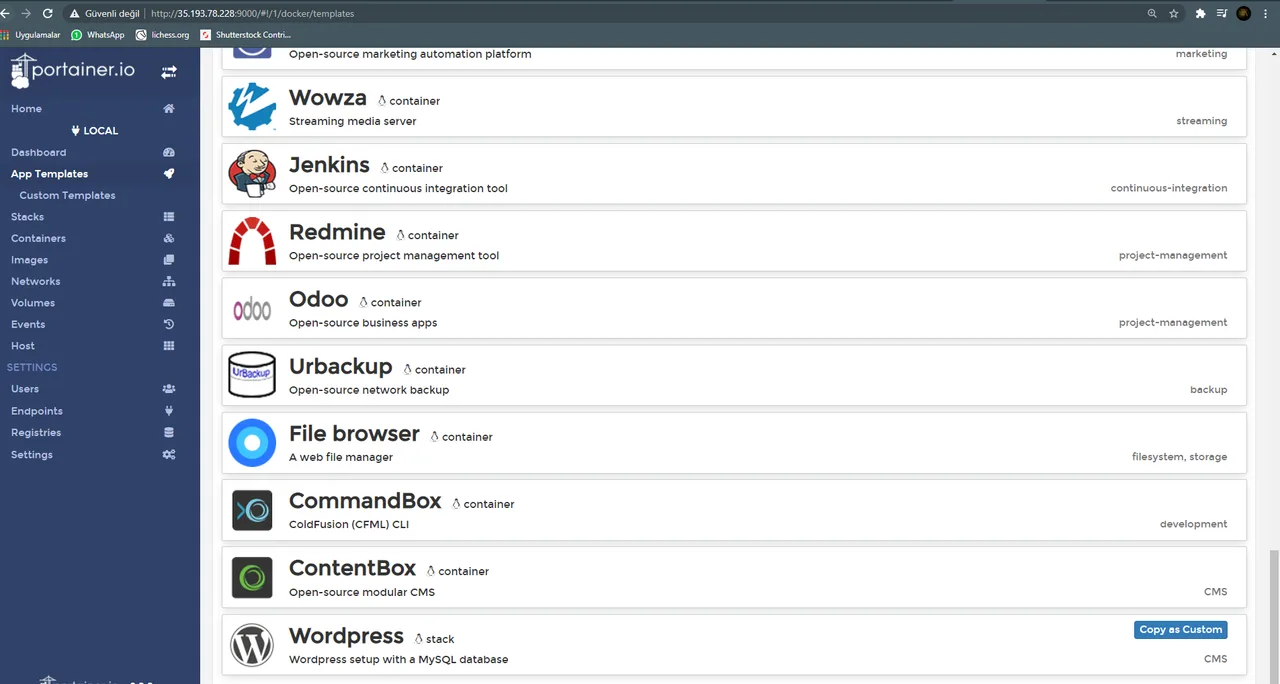
After clicking the word local shown above, we click App Templates on the left and then click WordPress at the bottom.
When we click it, it first asks us to create a root user password so it can install MySQL. It also asks for a random name for the stack, which does not matter.
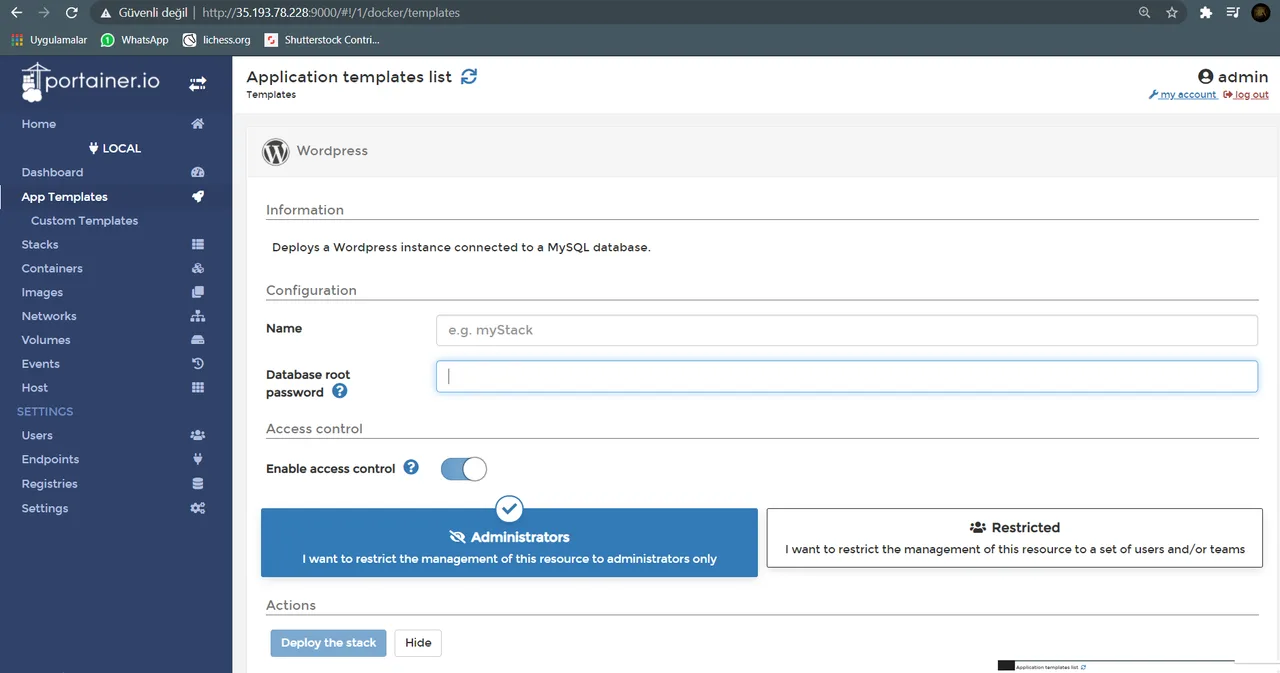
After clicking deploy we wait for the process to finish, then go to the containers section.
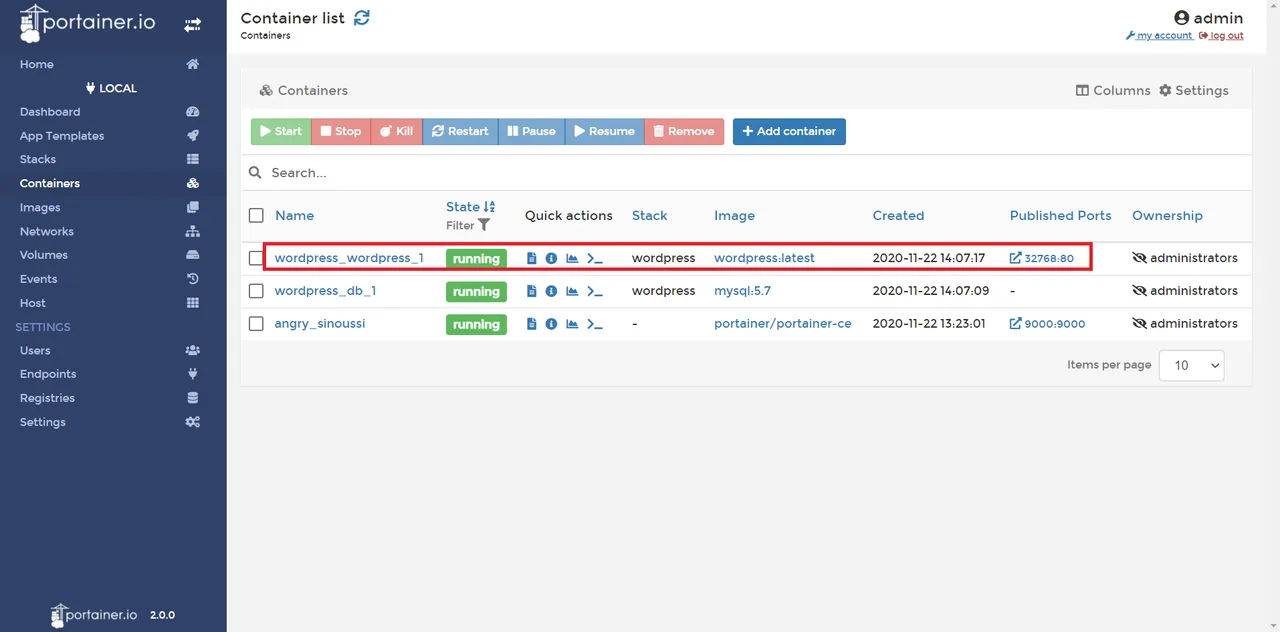
As we see above, WordPress is live, but on port 32768. We want to publish it directly on the main port of the URL, meaning 80. So we click the container for WordPress and then click Duplicate/Edit there.
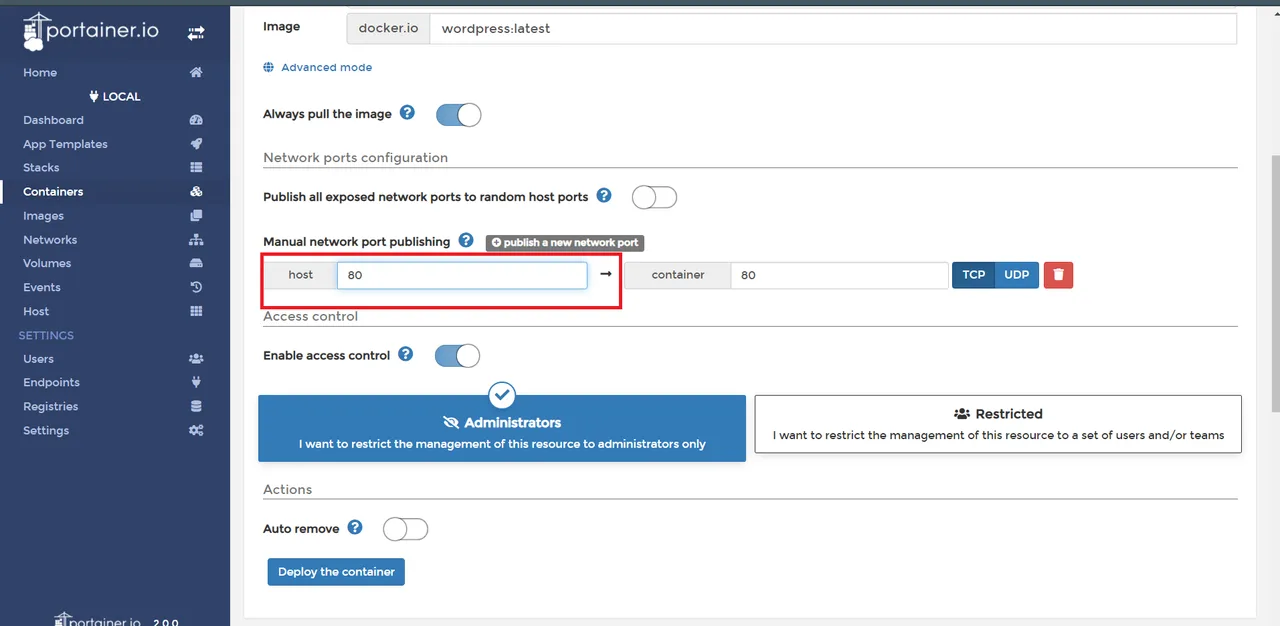
Then, in the host port field marked with a red box above, we write port 80, the port we want to host on, and click deploy to replace the container.
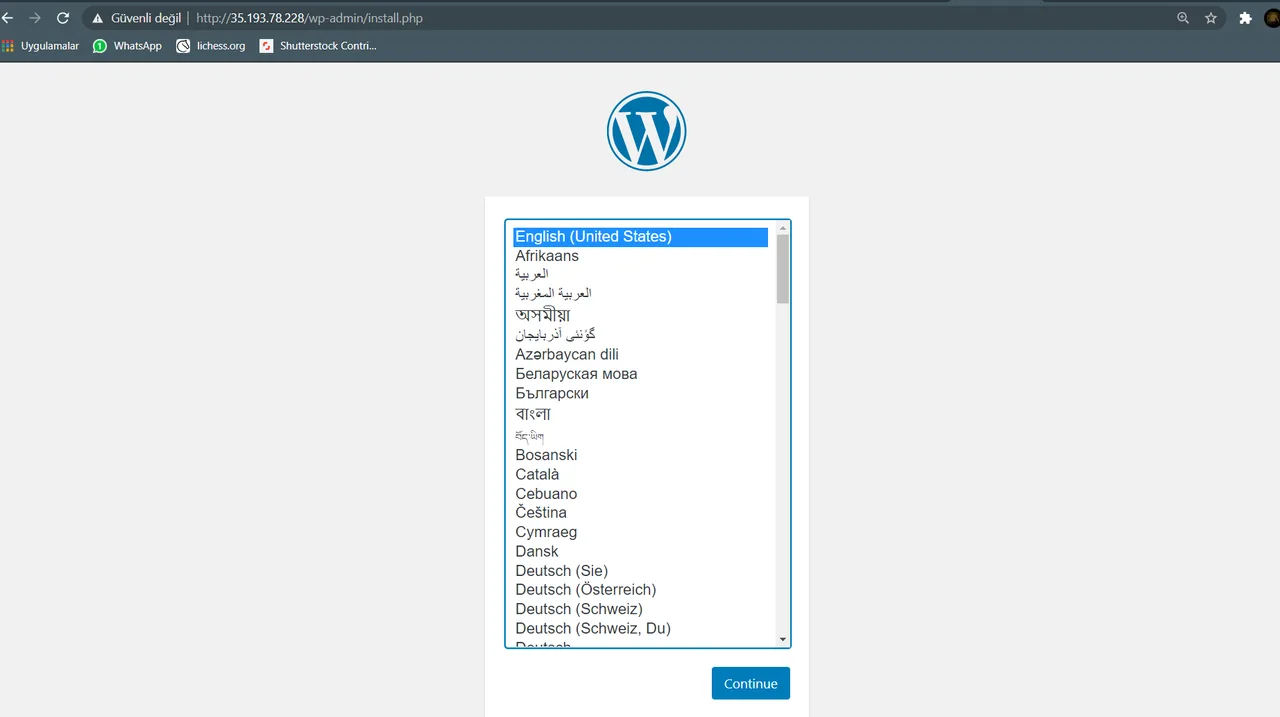
And that is it. This is how we install WordPress on our server too. In the next post I will explain how I reach and edit the php files in this WordPress with a web editor without needing a computer at all, and how I reach the server where I installed Portainer, or another server, from my phone through a web terminal.
In short, the more comfortable you get with Portainer, the shorter your deployment and development times become for web and network work. This tool, which I learned only two days ago, made my work a lot easier.
Stay well.