How do we add the OpenCV library to a Visual Studio project?
Download opencv-3.2.0-vc14.exe from the release page. Clicking through the installer brings up the screen below.
Also available in Turkish This post is a translation.

First we need to download the file called “opencv-3.2.0-vc14.exe” from the page above. When you click to install it, the screen below comes up.

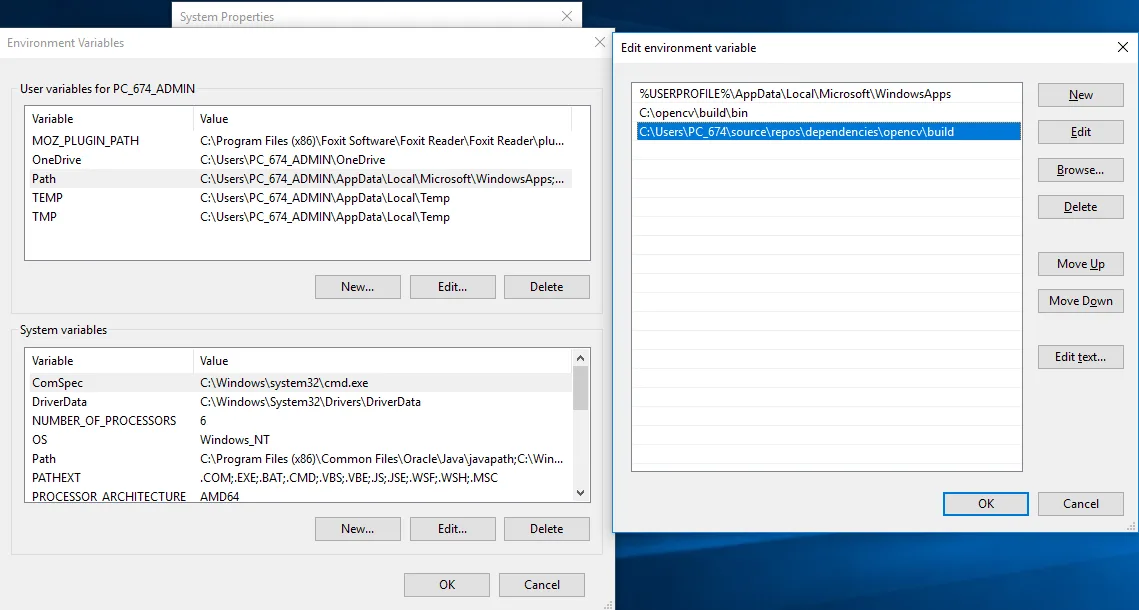
You can install it into any folder you like. Once it is installed there, open advanced system settings and add the path of the build folder inside the opencv folder to path.
After that we open a new project in Visual Studio.

Set the Debug target of the project to x64, then right click the project and go to Properties.
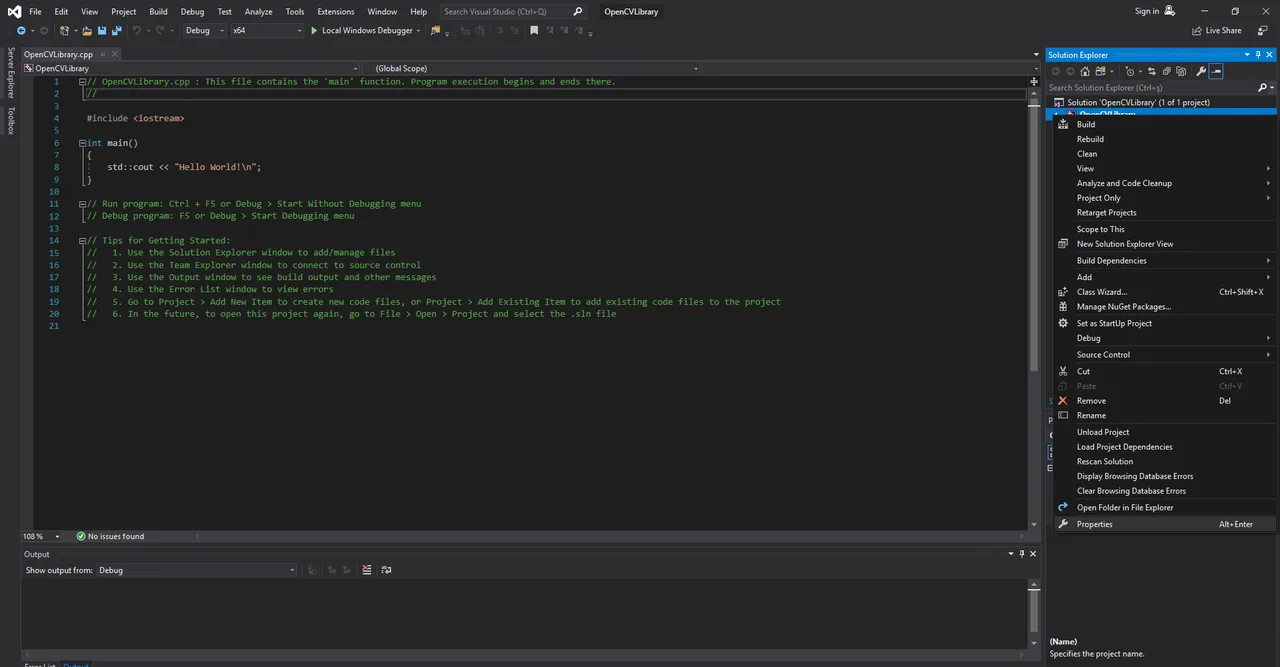
You will see the screen below.

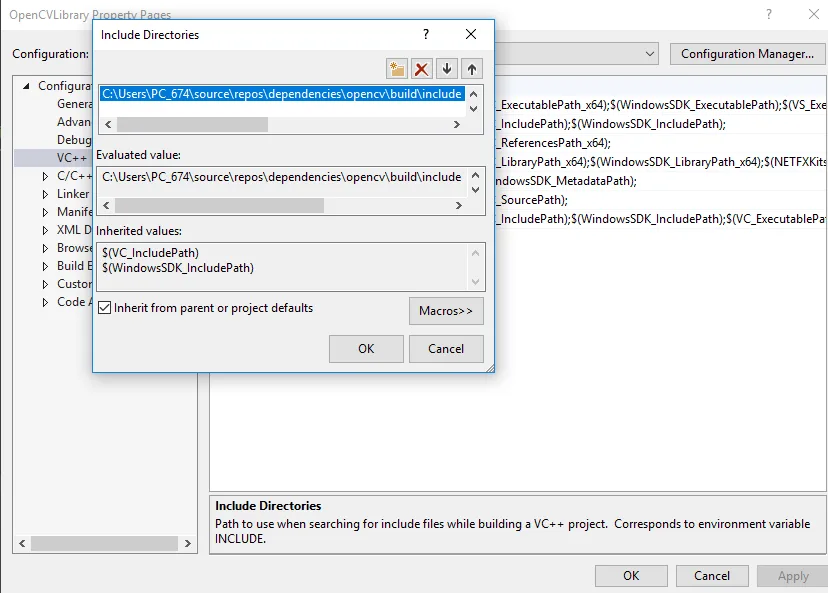
Go to VC++ Directories, click the Include Directories field and pick the include folder inside the OpenCV build folder. In the same way, add the x64\vc14\lib folder, again under build, to Library Directories.
Under the Input tab of Linker, add the library opencv_world320d.lib to Additional Dependencies. Use whichever version you downloaded.

Below is sample code so you can check whether OpenCV works in VS.
#include <opencv2/core/core.hpp>
#include <opencv2/highgui/highgui.hpp>
#include <iostream>

using namespace cv;
using namespace std;

int main( )
{

Mat image;

image = imread("Image_Path.jpg", CV_LOAD_IMAGE_COLOR);   //you need to enter the path of the image

if(! image.data )
{
cout <<  "Image not found or could not be opened!" << std::endl ;
return -1;
}

//displaying the image
namedWindow( "window", CV_WINDOW_AUTOSIZE );
imshow( "window", image );

//saving the image
imwrite("result.jpg",image);

waitKey(0);
return 0;
}
Good luck with it.
Abdullah Faruk ÇİFTLER